Do you want to create and display one popup per post tag in WordPress? So keep reading this article.
We're sure you're already familiar with the small window that appears when browsing a website. Well, it's called a popup or popup. Popups can appear in different sizes and on-screen positions on a website.
In WordPress, there are many plugins for creating popups, such as Elementor Pro, JetPopup, Brizy Pro, and more.
The important thing to remember is that pop-ups should not be annoying to your website visitors. Therefore, create a popup as simple and attractive as possible.
Table of contents
Some WordPress plugins to create popups
Elementor Pro
Elementor Pro is an Elementor extension with hundreds of premium features. It gives you powerful professional tools that accelerate your workflow and design. Elementor Pro gives you full control over the layout and design of your website. In this case, you can freely customize the design of your popup.
Use Elementor Pro to create a popup by post tag is very simple and easy to use. You can easily define the display conditions of your popup in a very precise way.
JetPopup
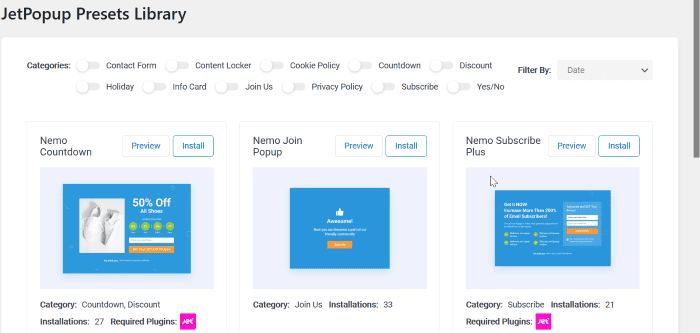
Crocoblock's JetPopup is an extension for Elementor. You can buy it as a standalone plugin or buy it in a bundle with other Crocoblock plugins. The advantage of using JetPopup to create a popup window is that it comes with a lot of cool features.
- You can play around with the popup window triggers.
- You can create animations for the popup window.
- A large number of popup templates are available.
Read also: 22 Best Premium Addons for Elementor
Brizy Pro
The popup builder of Brizy Pro offers you two options. The first is the click-activated popup, and the second is the automatic triggers and conditions.
- Opening on click: Your popup can be triggered simply by clicking on the elements of your page.
- Automatic triggers and conditions: You can configure visitor actions that will determine when popups are displayed.
How to Create and Display Popup by Post Tag in WordPress with Elementor
As mentioned earlier, you have several options for creating a popup in WordPress. In this tutorial, we will show you how to create and display a popup per post tag using the version Elementor Pro, so make sure you already have one.
Step 1: Create the popup template
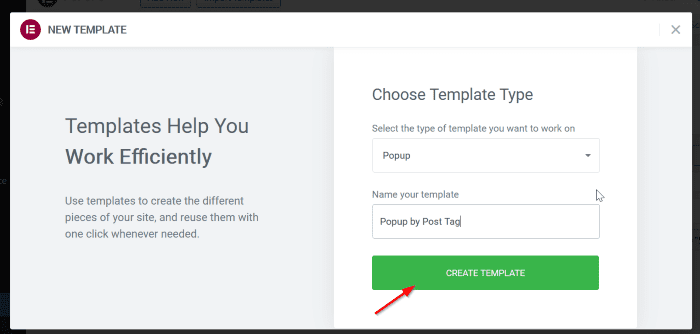
The first thing to do is to create a new Popup template. To create a new Popup template, go to Templates > Popups on your WordPress dashboard and click on the button Add new.

Next, add the name of your Popup and click the button CREATE A MODEL.
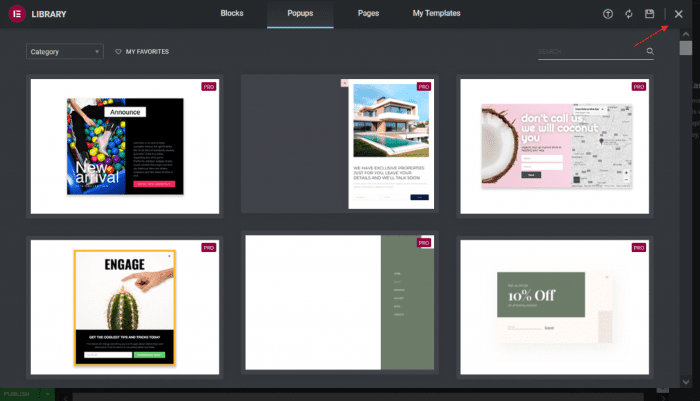
You will be directed to the template library, you can choose a template from the library window or design your own Popup template. To use a template from the library, just click the button Insert.
But in this tutorial, we are going to create the Popup template from scratch. Click the icon X to close the template library.
Step 2: Adjust Popup Settings
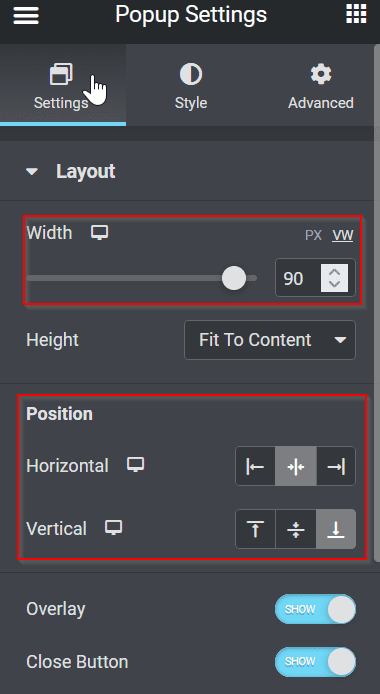
We need to make some adjustments in the Popup settings before we start creating a Popup template. You can find the best settings for your site. In this tutorial, we will show you the Popup settings of your choice.
Click the gear icon in the lower left corner. In the Popup settings, change the Width in 90% of the width of the view (VW) Et the Position en Center-Bottom.
Step 3: Design the Popup
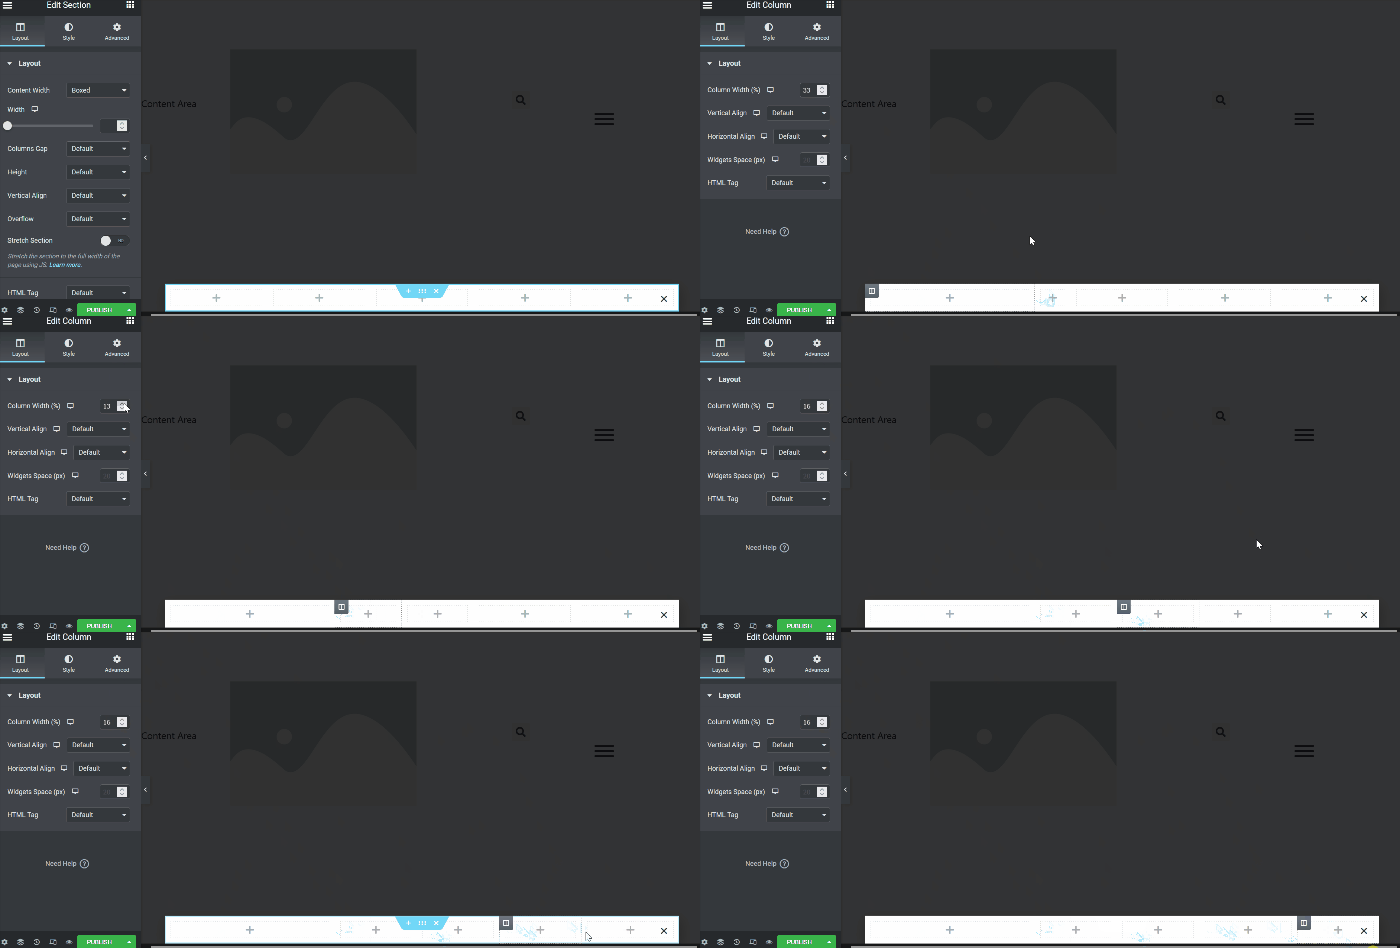
Next, design your Popup template. Add a new section and select the 5 column structure. In the section settings, set the Width on 950. You can play with your settings.
For example, you can go to the tab Style to set the background, go to the tab Advanced to customize the margin, and many more.
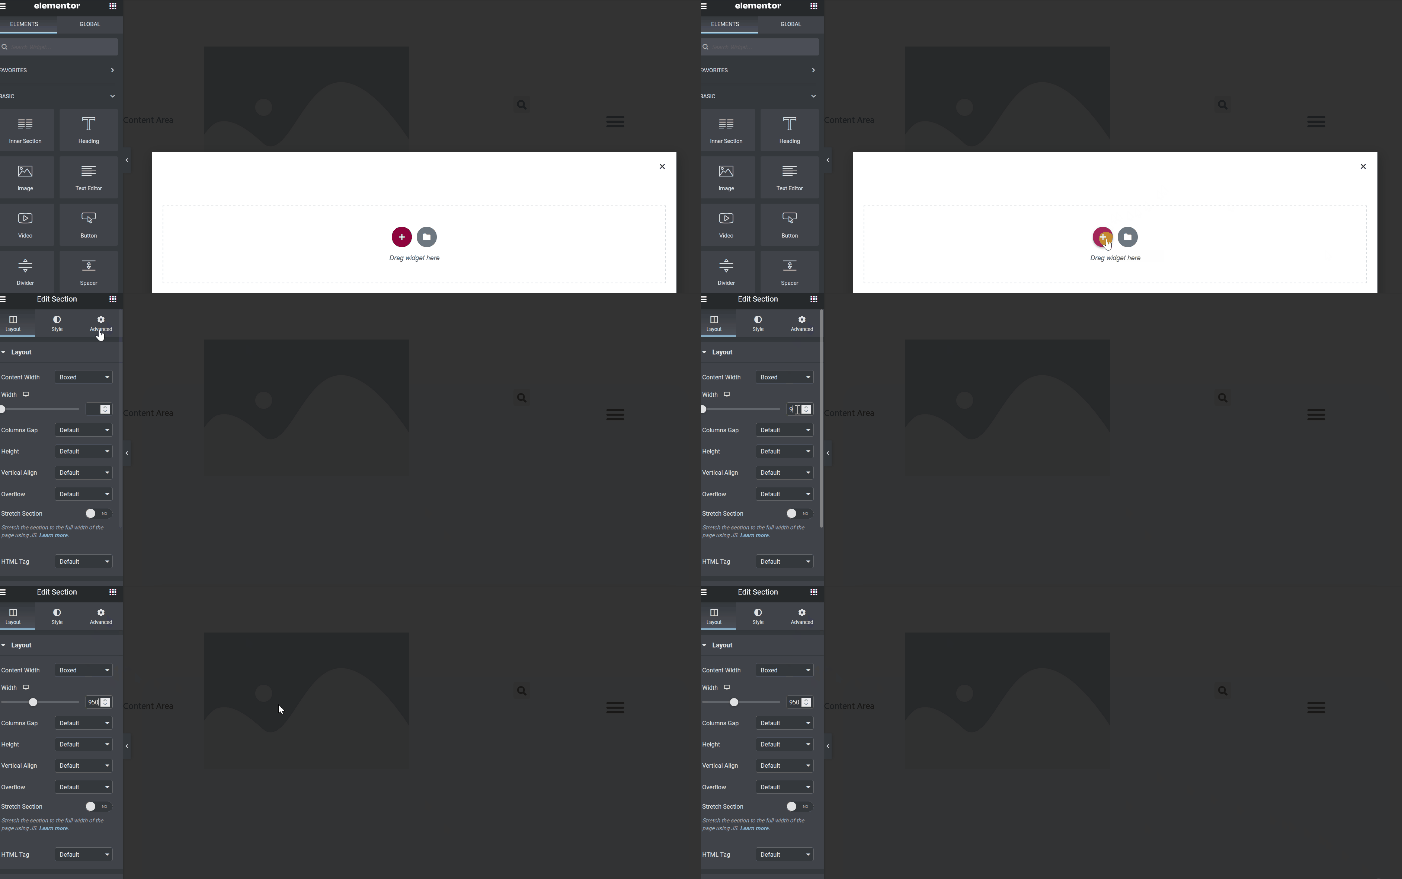
Now back to your columns. In the left column, set the width to 33%, and for the other four, to 16%.
In the left column, we'll add a Title widget with some text. You can add text inviting your website visitors to view other content that is relevant to the current content, or any other text of your choice.
On the right, we'll add an Image widget. You can add images from thumbnails/featured images of posts or upload them manually.
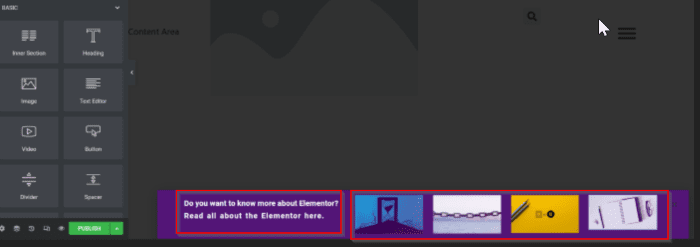
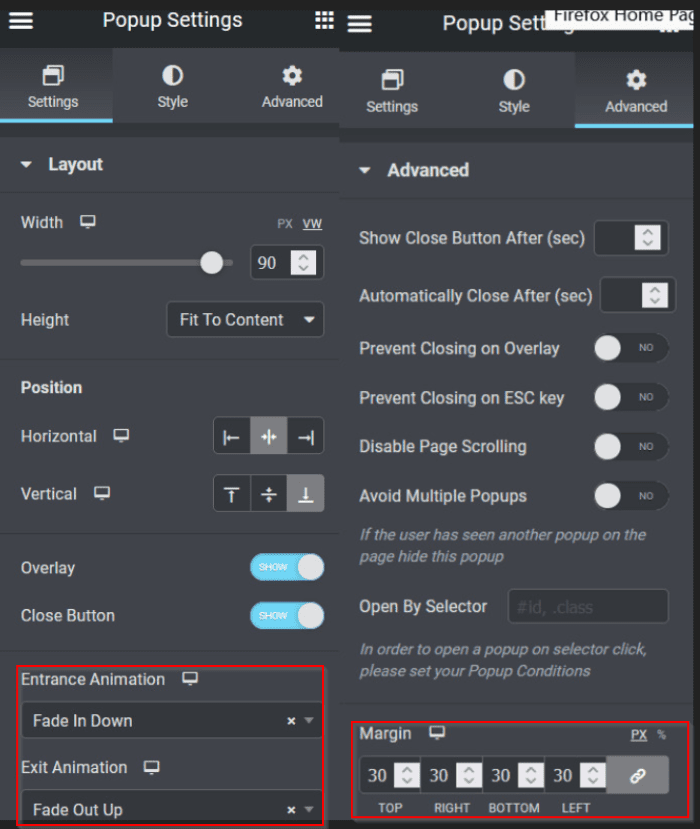
Now the structure is ready. Go back to Popup Settings to customize entry, exit, and margin animations. In this tutorial, we set the input to Fade down and the output on Fade up. Then go to the tab Advanced and set the margin to 30 (common value for links).
Step 4: Publish the Popup
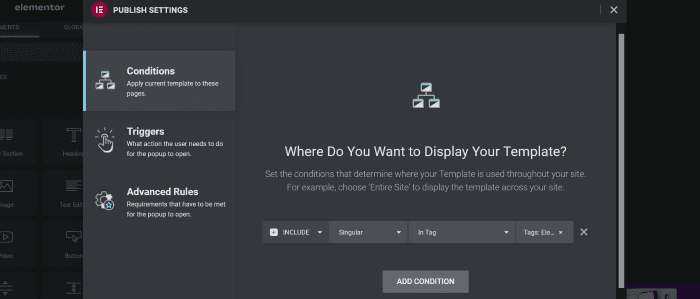
Now that the design is ready, click the button PUBLISH to set display conditions and triggers. To define the display condition, click on the button ADD A CONDITION and select your option from the drop-down list.
As you want to display the Popup by post tag, you can set the following display conditions (see animation).
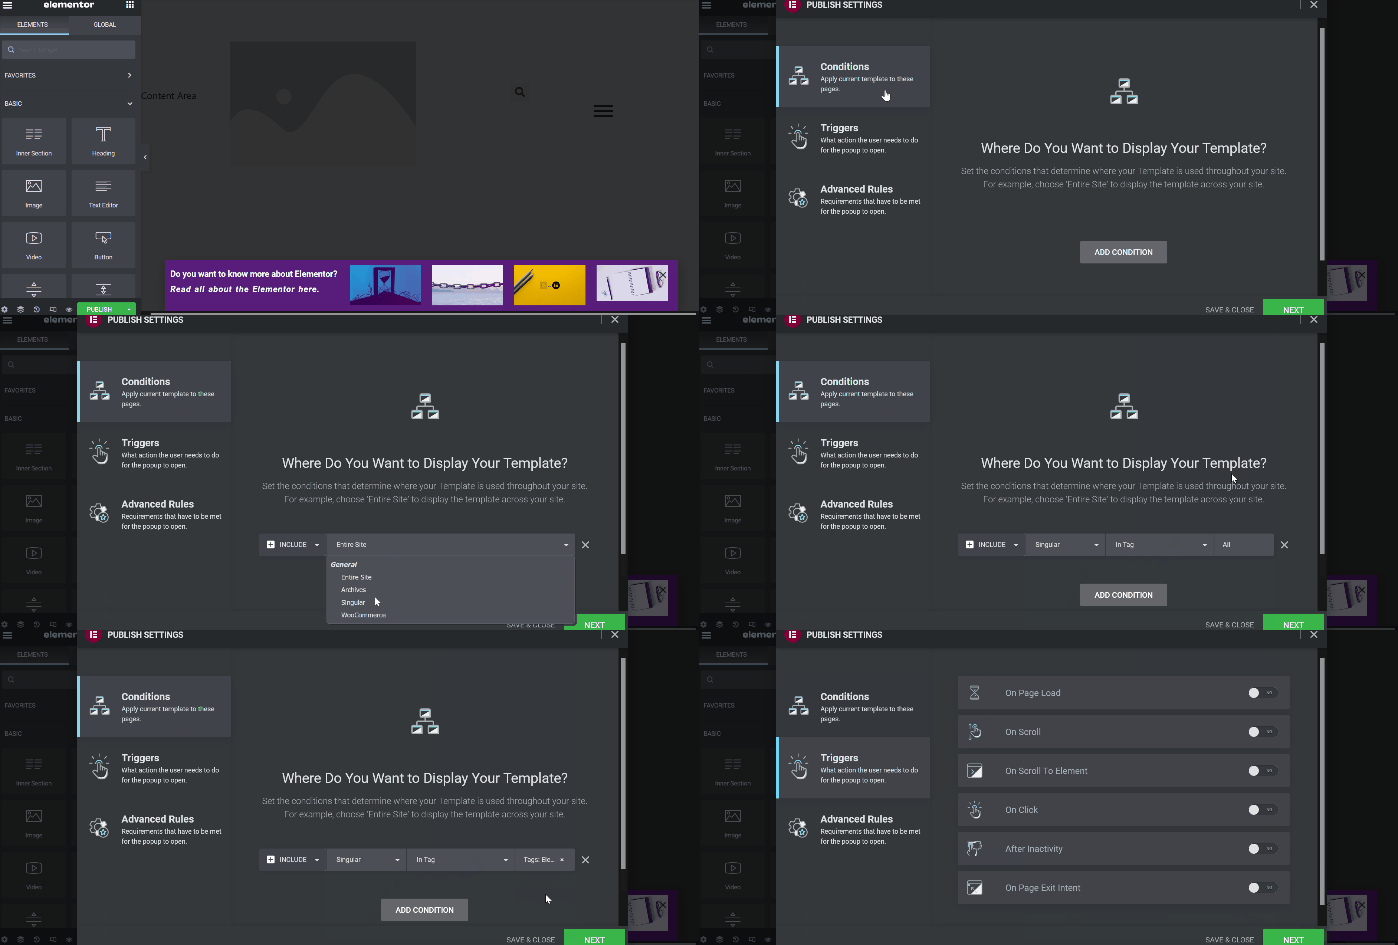
Click Next. In the tab triggers, set the trigger to On Scroll flipping the switch to Yes. Define the Direction on Bottoms and Width over 95%. Because we want the Popup to appear when visitors reach the end of our article.
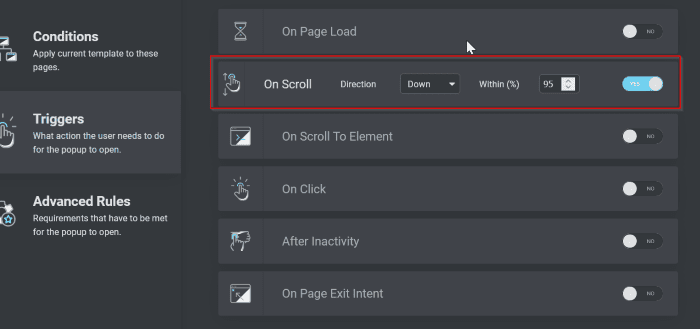
In this tutorial, we are not going to define Advanced Rules. So click on SAVE AND CLOSE. Well, now we're done.
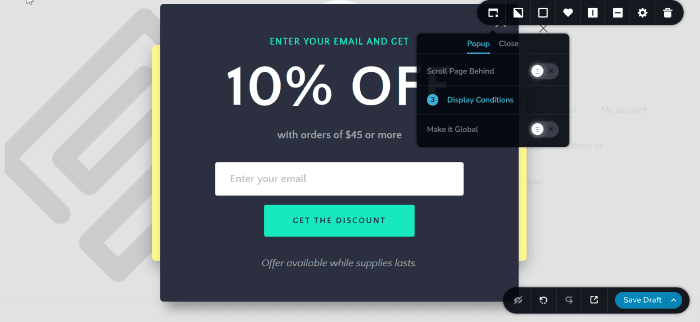
Let's see what it looks like.
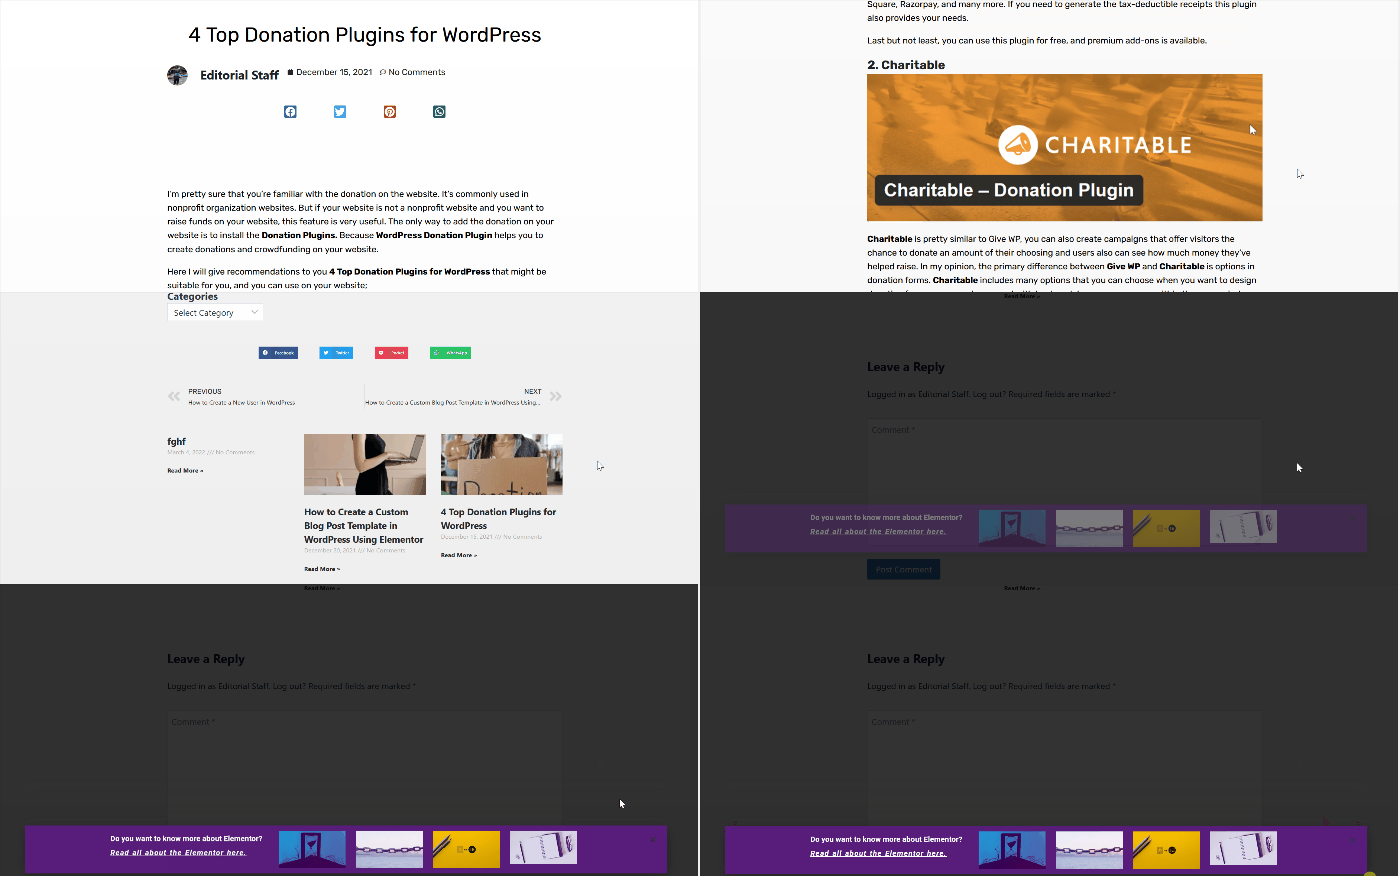
Here you have just finished your popup. See also our related articles:
- 6 Handy CSS Snippets for Elementor's Posts Widget
- How to Create a Listing Page with Elementor Loop Builder
- How to Add Business Hours in Your Elementor Website
- How to Add Line Break in Elementor Button Text
- How to Create and Edit a Footer in Elementor
- How to Add Image Mask in Elementor
- Elementor or Brizy: Which is the best WordPress page builder?
Related articles
- 22 Best Premium Addons for Elementor
- Elementor vs Beaver Builder: Detailed Comparison of Page Builders
- Elementor Review 2024: Experience with Elementor (Pros, Cons, Features & More)
- How to Create an Interactive Circle in Elementor
- How to Make an Elementor Website Super Fast: Complete Tutorial
- How to migrate a site to Elementor Cloud
- 5 Best Instagram Feed Plugins for Elementor [Our Top Picks]
- How to Use Advanced Accordion in Elementor


